Phishing Simulation With Gophish
A simple guideline for conducting phishing simulation on your organisation

Background
Gophish is a powerful, easy-to-use, open-source phishing toolkit meant to help pentesters and businesses conduct real-world phishing simulations.
Gophish is a phishing framework that makes the simulation of real-world phishing attacks dead simple. The idea behind gophish is simple – make industry-grade phishing training available to everyone. “Available” in this case means two things
Affordable – Gophish is open-source software that is completely free for anyone to use.
Accessible – Gophish is written in the Go programming language. This has the benefit that gophish releases are compiled binaries with no dependencies. In a nutshell, this makes installation as simple as "download and run"
This guideline introduces Gophish and shows how to use the software, building a complete campaign from start to finish.
System Requirement
There is no specific system requirement for these tools, for this guide purpose we are using the following system resource:
- Processor : 1VCPU
- Memory : 1024MB
- Disk : 20GB
Installation & Configuration
Software installation
Gophish is provided as a pre-built binary for most operating systems. With this being the case, installation is as simple as downloading the ZIP file containing the binary that is built for your OS and extracting the contents. Below is the step-by-step installation process:
- Download the latest binary.
sudo wget https://github.com/gophish/gophish/releases/download/v0.11.0/gophish-v0.11.0-linux-64bit.zip - Unzip the content.
sudo unzip gophish-v0.11.0-linux-64bit.zip - Within the directory, you will be presented with a “gophish” file, change the file permission.
sudo chmod +x gophish

Gophish Configuration
After the installation process, we need to make some changes to the config file, Below is the step-by-step of this process:
- Open the
config.jsonfile. - In order for the admin server to listen to our public IP address on TCP port 3333, we need to change
the admin_server->listen_urlto be0.0.0.0:3333. - With that changes we have the following config.json file:
{
    "admin_server": {
        "listen_url": "0.0.0.0:3333",
        "use_tls": true,
        "cert_path": "gophish_admin.crt",
        "key_path": "gophish_admin.key"
    },
    "phish_server": {
        "listen_url": "0.0.0.0:80",
        "use_tls": false,
        "cert_path": "example.crt",
        "key_path": "example.key"
    },
    "db_name": "sqlite3",
    "db_path": "gophish.db",
    "migrations_prefix": "db/db_",
    "contact_address": "",
    "logging": {
        "filename": "",
        "level": ""
    }
}
There are other improvements that can be made to this process, but in this testing process it is not done, below are improvements that can be made as described on the Installation page of the Gophish User Guide:
- Enable HTTPS.
- Use MySQL Database as the default database.
Running Gophish
To run gophish, we simply need to execute the gophish file that has been mentioned earlier as ./gophish
 When we execute gophish for the first time, it will generate the default username and password, make sure to write down the default password.
For a more convenient way to run gophish, we can create and start it as a linux service, below are the step-by-step to implement it:
- Create the script file.
sudo touch /etc/init.d/gophish - Open the file.
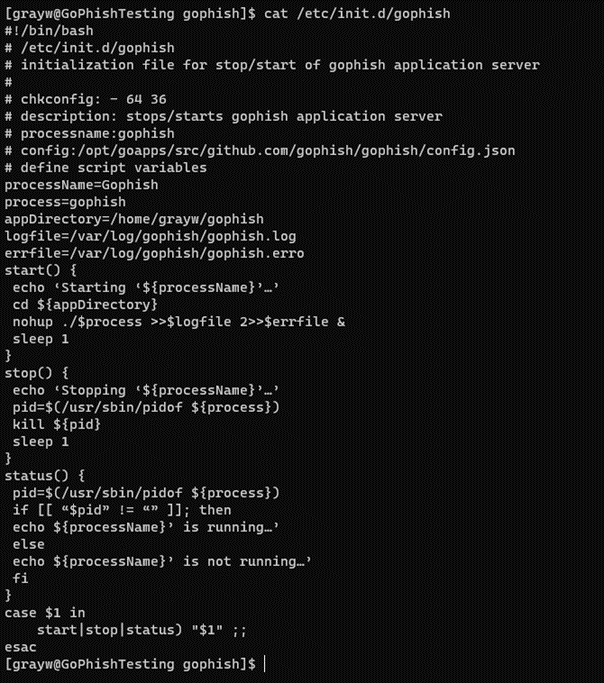
sudo nano /etc/init.d/gophish - Copy this script to the file and save the changes, make sure to change the appDirectory parameter to match the installation location.
#!/bin/bash
# /etc/init.d/gophish
# initialization file for stop/start of gophish application server
#
# chkconfig: - 64 36
# description: stops/starts gophish application server
# processname:gophish
# config:/opt/goapps/src/github.com/gophish/gophish/config.json
# define script variables
processName=Gophish
process=gophish
appDirectory=/path/to/gophish/directory
logfile=/var/log/gophish/gophish.log
errfile=/var/log/gophish/gophish.erro
start() {
 echo ‘Starting ‘${processName}’…’
 cd ${appDirectory}
 nohup ./$process >>$logfile 2>>$errfile &
 sleep 1
}
stop() {
 echo ‘Stopping ‘${processName}’…’
 pid=$(/usr/sbin/pidof ${process})
 kill ${pid}
 sleep 1
}
status() {
 pid=$(/usr/sbin/pidof ${process})
 if [[ “$pid” != “” ]]; then
 echo ${processName}’ is running…’
 else
 echo ${processName}’ is not running…’
 fi
}
case $1 in
    start|stop|status) "$1" ;;
esac
- Change the file permission.
sudo chmod 744 /etc/init.d/gophish
- Make sure Gophish start on boot.
sudo chkconfig gophish on - Create the log directory for Gophish.
sudo mkdir /var/log/gophish - Start the Gophish services
sudo systemctl start gophish Check the gophish services status
sudo systemctl status gophish
Check the Gophish process
ps -ef |grep [g]ophish
As of now, gophish is running as a service on the server, we can continue to start a phishing campaign.
Create Phising Campaign
Login
Connect to gophish console using https://xx.xx.xx.xx:3333/ on your browser,

Login using the default admin and password that mentioned earlier, after logged in we must change the default password.

Sending Profile
To send emails, Gophish requires you to configure SMTP relay details called "Sending Profiles". To setup a sending profile, click the "Sending Profiles" navigation entry in the sidebar and click the "New Profile" button.


Below is the description of each parameter on sending profile menu:
- Name : This sending profile name
- Interface Type : SMTP
- From : Email address that will be sending the phishing email.
- Host : Host address of the email server.
- Username : Valid username of the email server.
- Password : Valid password of the email server.
For this guideline, we can use SMTP services from any of email marketing provider (mailgun, mailchimp, sendinblue, etc).

After that, we can try this configuration by clicking Send Test Email button and fill the form.

This will send a test email like the one below.

Users and Groups
To create a group, first, navigate to the "Users & Groups" page in the navigation menu and click the ‘new group’ button

For adding users to the gophish, we can add in two ways:
- Manually Adding Users To add users manually, fill in the text boxes for "First Name", "Last Name", "Email", and "Position" and click the "Add" button.

- Bulk Uploading Users Adding users manually can be a pain. To fix this, Gophish lets you upload users in bulk from a CSV file. The CSV format gophish expects has the following header values:
- First Name
- Last Name
- Position
To upload a CSV with user information, click the "Bulk Import Users" button and select the CSV you want to upload. Users are then uploaded and displayed in the dialogue.
Landing Pages
Landing pages are the actual HTML pages that are returned to the users when they click the phishing links they receive. Landing pages support templating, capturing credentials, and redirecting users to another website after they submit their credentials.

To create a landing page, click on the "Landing Pages" entry in the sidebar and click the "New Page" button.

A powerful feature of Gophish is the ability to import a site from a URL. To import a site, click the "Import Site" button.
After entering the URL and clicking "Import", you should see the HTML of the URL populated into the editor. Below is the example of an imported hashnode login site.

Gophish makes it easy to capture credentials from the landing page. To capture credentials, simply select the checkbox that says "Capture Submitted Data".
Email Template
A "Template" is the content of the emails that are sent to targets. They can be imported from an existing email, or created from scratch. They also support sending attachments.
Additionally, templates can contain tracking images so that gophish knows when the user opens the email.
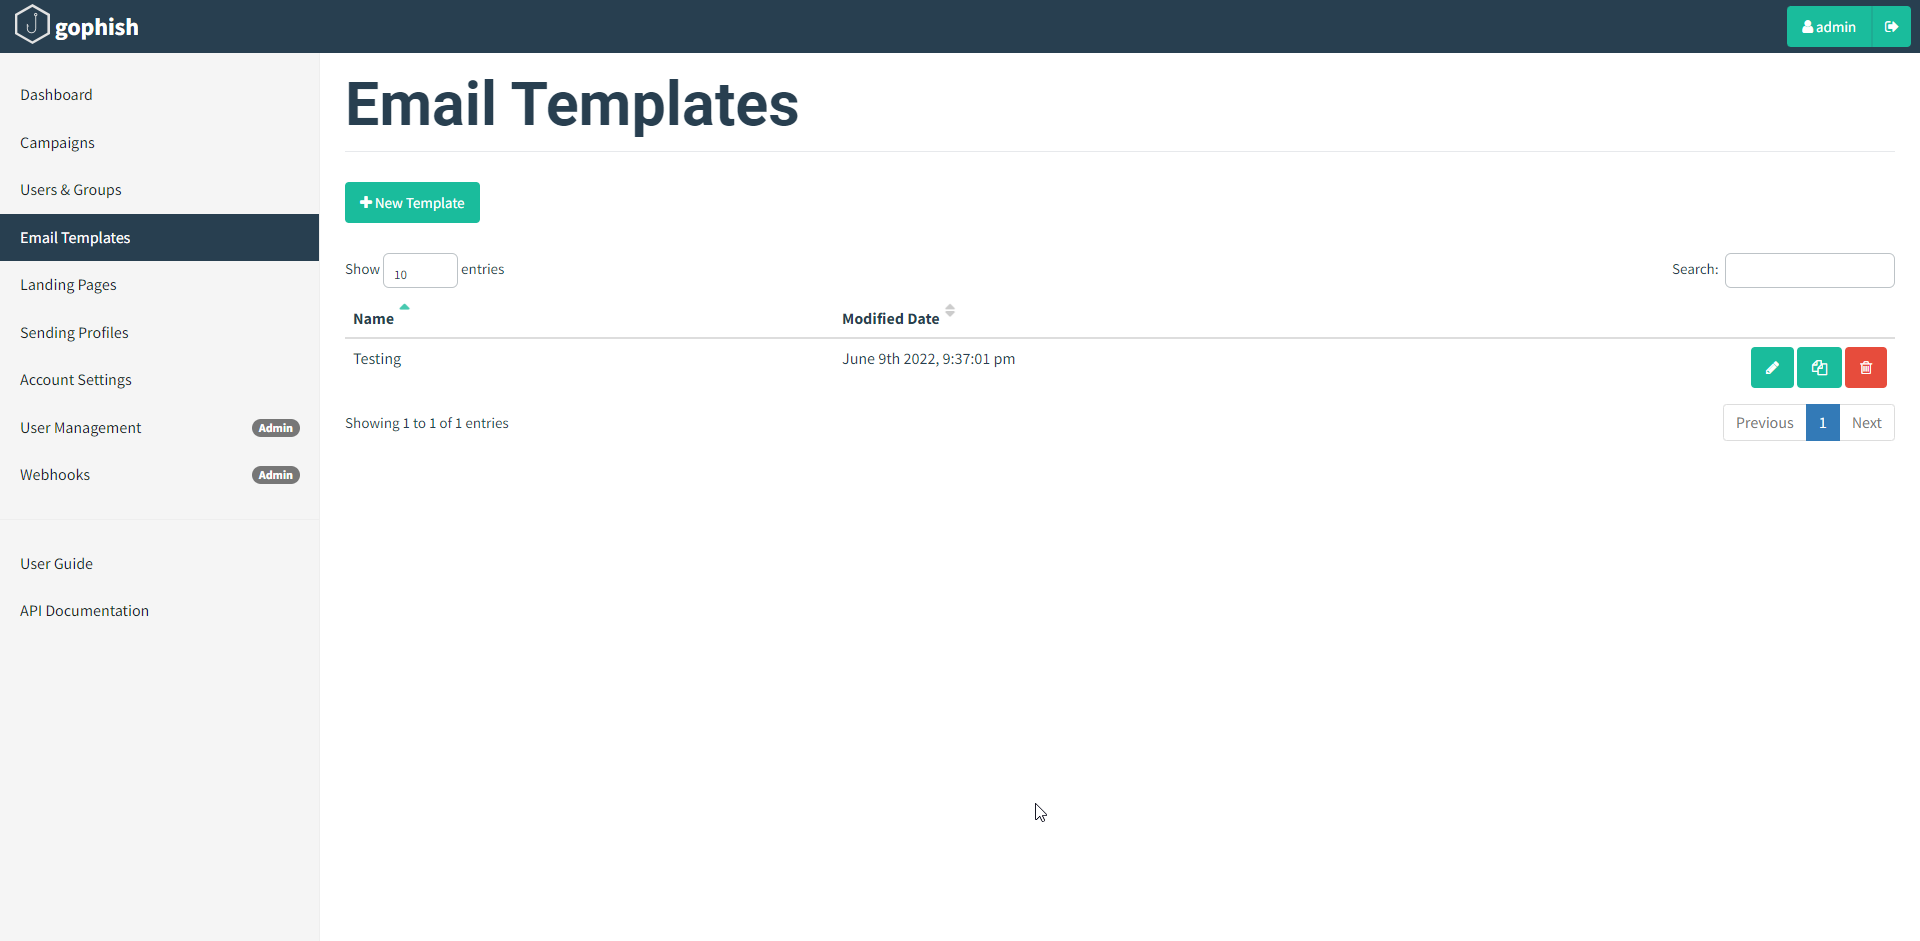
To create a template, first, navigate to the “Email Templates” page and click the “New Template” button.

A powerful feature of Gophish is the HTML editor. To switch between the HTML source code and the visual view, click the "Source" button.

Gophish supports the ability to import an email from the raw content. To do this, click the "Import Email" button and paste in the original email content. This content is usually found through the "View Original" feature of many mail clients:
Below are the custom variable that can be used on email template:

Launching a Campaign
Gophish is centered around launching campaigns. This involves sending emails to one or more groups and monitoring for opened emails, clicked links, or submitted credentials. To configure and launch a campaign, click the "Campaigns" entry in the navigation sidebar.


- Name - The name of the campaign
- Email Template - The email that is sent to campaign recipients. This is created in the Email Templates section of the documentation.
- Landing Page - The HTML that is returned when a recipient clicks the link in the email template. This is created in the Landing Pages section of the documentation.
- URL - This is the URL that populates the {{.URL}} template value, commonly used in email templates. This should be a URL or IP address that points to the Gophish phishing server and is reachable by the recipient.
- Launch Date - This is the date that the campaign will begin. See Scheduling Campaigns for more information.
- Send Emails By - This is the date all emails will be sent by. See Scheduling Campaigns for more information.
- Sending Profile - This is the SMTP configuration to use when sending emails. This is created in the Sending Profiles section of the documentation.
- Groups - This defines which groups of recipients should be included in the campaign.
Viewing Campaign Result
When a campaign is launched, you are automatically redirected to the campaign results screen:

On the results page, you will see overview information on the campaign status as well as detailed results for each target.
To export campaign results in CSV format, click the "Export CSV" format and select the type of results you want to export:
To complete a campaign, click the "Complete" button and confirm that you want to mark the campaign as completed.
And with this, we are successfully launching a phishing campaign.
Other Configuration
User Management
Gophish supports user accounts with different roles. Right now, we offer two separate roles that can be assigned to users:
User - This role allows the user to do anything except system-level administrative tasks, such as managing users, managing webhooks, etc.
Admin - This is a system-level administrative role that has full permissions to manage the Gophish installation
To register new user accounts and manage existing ones, login as an administrative user and navigate to the "User Management" page:

To register a new user, click the "+ New User" button, which will cause the following dialogue to appear:

Notes: Never change or delete the default admin on gophish, this process will make the system unstable and cannot start on the next system startup.